Developing for VZ200 – Part 2
I decided to try setting up Visual Studio for my development environment. It’s not as easy to set up as Notepad++ was, but everything is integrated nicely, including GITHUB support so I figured I’d go with it.
You need to set up a custom task in Visual Studio. You can read about that on the “Tasks in Visual Studio Code” page. Below is a screenshot of how I set up the Z88DK compiler to compile my Assembler and C code together.
Configure Visual Studio for VZ200 programming
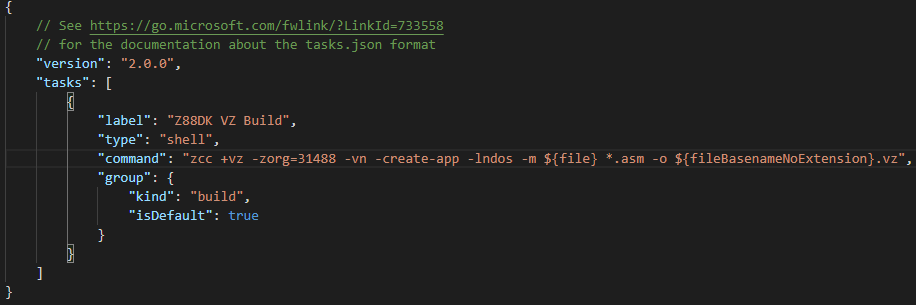
The below code can be copied into the tasks.json file you created. The switches include setting the VZ computer for the output file format “+vz”, the Origin (or beginning memory location) for the code “-zorg=31488” which is 7b00h, “-vn” tells zcc to supress extra output, “-create-app” creates the application to load into the VZEm emulator, “-lndos” means to not add DOS extensions if you don’t need them. I have a couple of Assembler files so I add *.asm to the compile line. Note that I tried using the Visual Studio “args” field in tasks.json but it was not compatible with how Z88DK wanted it to work. This works nicely.
{
// See https://go.microsoft.com/fwlink/?LinkId=733558
// for the documentation about the tasks.json format
"version": "2.0.0",
"tasks": [
{
"label": "Z88DK VZ Build",
"type": "shell",
"command": "zcc +vz -zorg=31488 -vn -create-app -lndos -m ${file} *.asm -o ${fileBasenameNoExtension}.vz",
"group": {
"kind": "build",
"isDefault": true
}
}
]
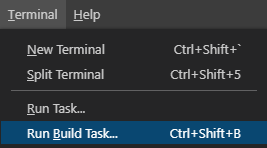
}Now to compile my C and Assembler code I just execute “Run Build Task” or hit the shortcut “Ctrl+Shift+B”:
Now my .vz file will be compiled and ready for loading in the VZEm emulator (or any other VZ emulator you happen to have lying around).
You will probably want to set up Github for your Visual Studio. I found a little YouTube “Video Visual Studio Code | How to use git and github“. You could always just install “Git for Windows“.
I had already installed Git for Windows and set it up for a different project so it was already configured nicely for me. You could always use the Github Desktop GUI app but it’s another app to launch whereas this is built into Visual Studio.
You will see the squiggly lines where Visual Studio cannot find your include files. You can fix this by editing the Visual Studio Include Path. Under Preferences Settings:
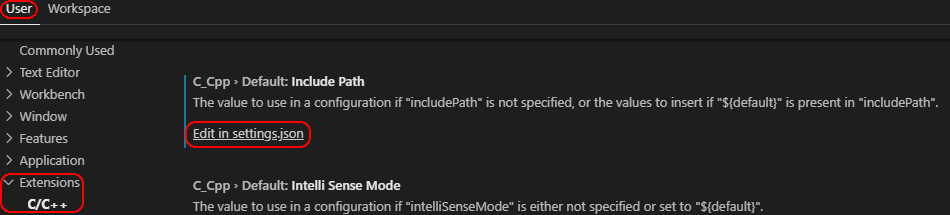
Enter the following code, changing your z88dk\include path to your actual path:
{
    "git.enableSmartCommit": true,
    "C_Cpp.default.includePath": [
        "D:\\Dev\\VZ\\z88dk\\include"
    ]
}
You may also find it useful to install the Visual Studio extension “Z80 Assembly”.
View the Part 1 tutorial for testing in an emulator.
Happy coding and compiling! 🙂
Comments are Closed